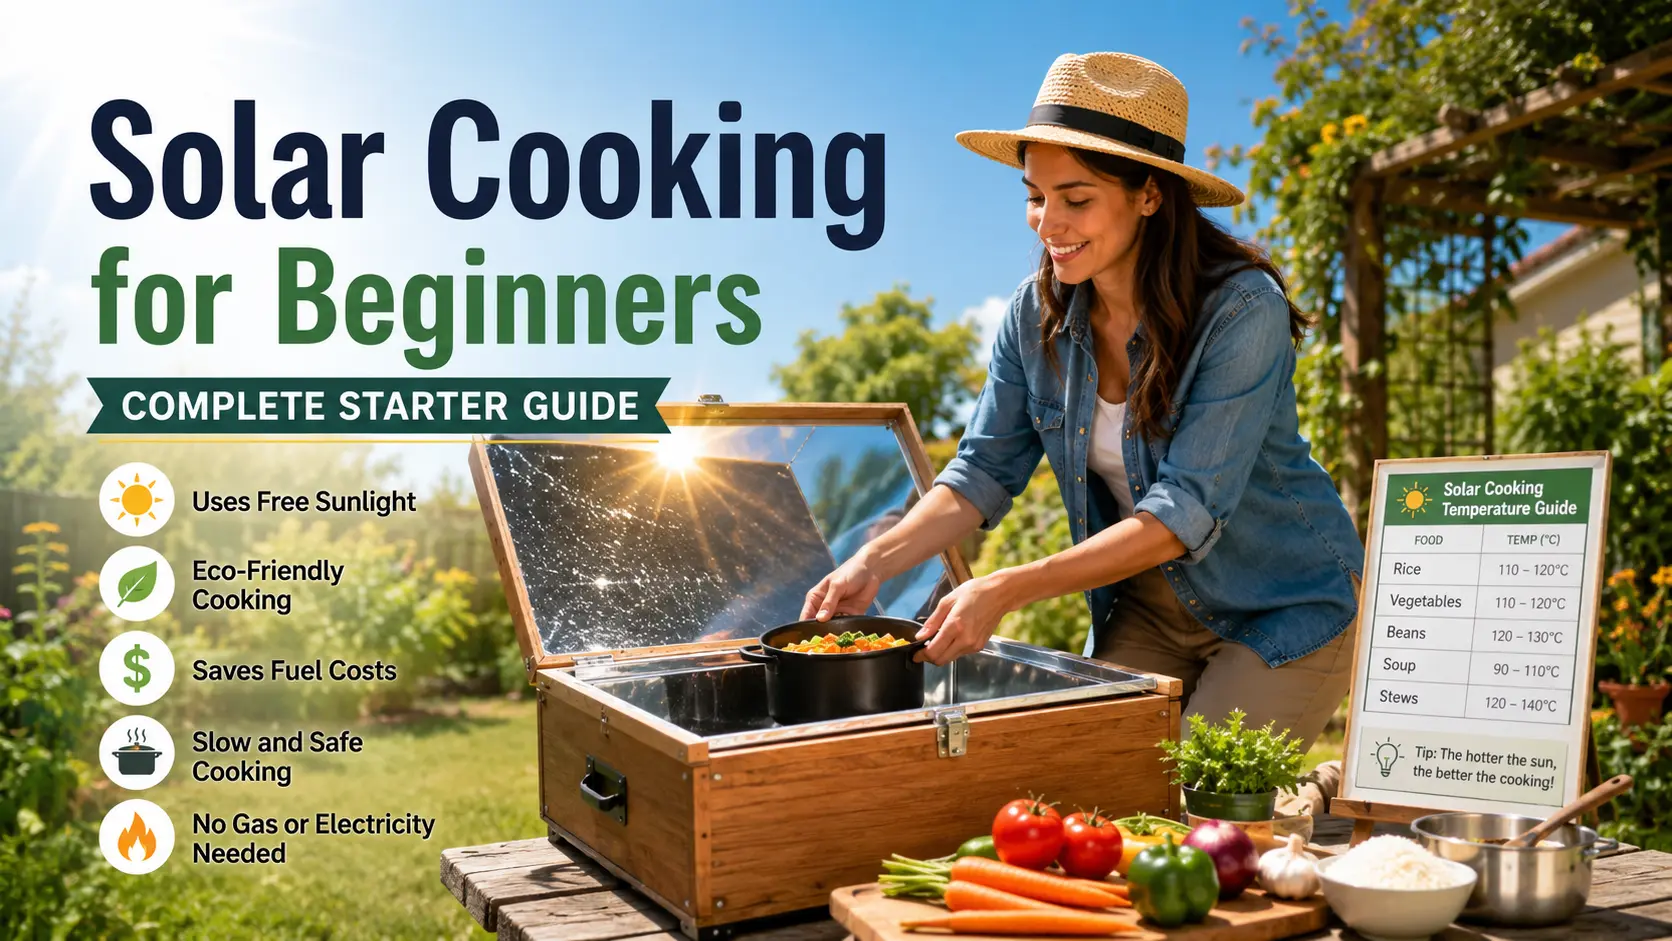
If you are interested in solar cooking for beginners, this complete starter guide will show you how to prepare delicious meals using pure sunlight without electricity or gas.”
Solar cooking is one of the simplest and most eco-friendly ways to prepare food using sunlight without electricity or gas.
A Note from Me: I still remember the first time I tried solar cooking. I was skeptical that a few reflective panels could actually cook a meal, but when I opened that dark pot and saw perfectly fluffy rice steaming hot—purely from daylight—I was hooked. It feels a bit like magic, but it’s just pure, clean science. Whether you’re trying to cut down your energy bills, prepping for off-grid adventures, or just want a fun backyard project, I promise you this: it will completely change how you think about cooking.
In this complete guide, you’ll learn how solar cookers work, how to use them step-by-step, what foods you can cook, and practical tips to get started successfully.
👉 Looking for the easiest way to start? Check our recommended beginner solar cookers here → Best Solar Cookers on Amazon
⭐ What Is a Solar Cooker and How Does It Work?
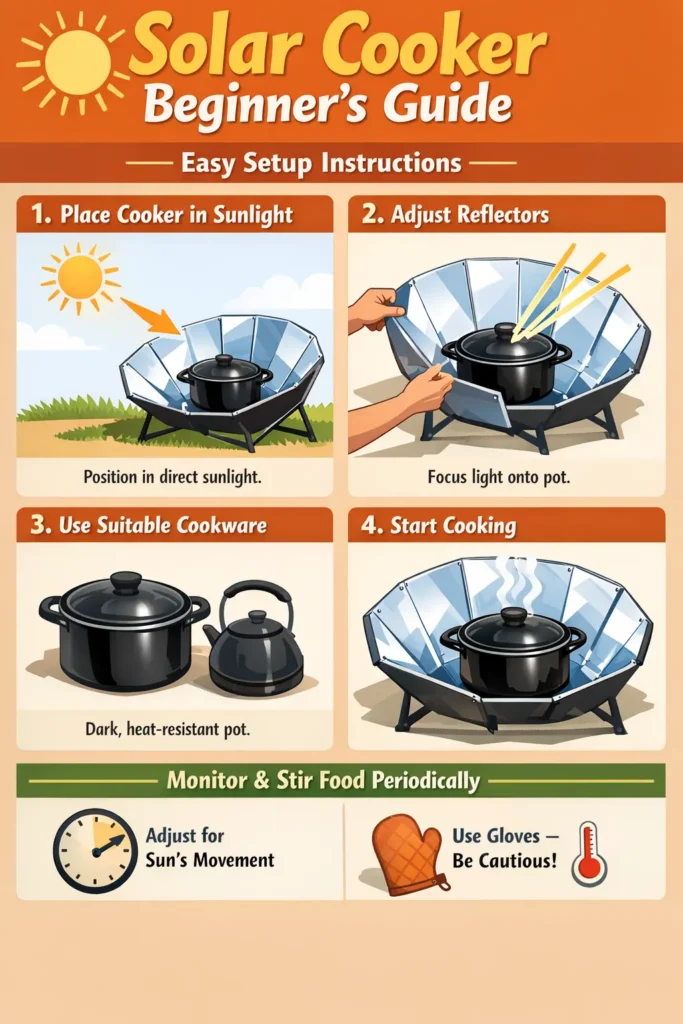
A solar cooker uses sunlight to generate heat for cooking food. It works based on three simple principles:
- Reflection – Sunlight is directed into the cooker using reflective surfaces
- Absorption – Dark cookware absorbs heat efficiently
- Insulation – Heat is trapped inside to cook food evenly
This method is a practical application of Solar energy and is widely used around the world.
The Physics of Thermal Conversion and Heat Trapping
The secret to cooking purely with daylight relies on converting light waves into heat energy and preventing that heat from escaping. When direct ultraviolet and visible light rays hit the reflective panels of a cooker, they are directed downward toward the cooking chamber. The light then strikes the dark surface of your cookware. Bright metallic pots reflect light away, but matte black or dark enamel surfaces absorb up to 90% of the light waves, converting them directly into infrared heat energy.
Once that heat is created inside the pot, a protective barrier—such as a sealed glass lid, clear plastic sleeve, or double-glazed window—creates a localized greenhouse effect. Shortwave sunlight easily penetrates the clear barrier, but the longwave heat energy generated inside cannot escape as quickly. This trapped heat continuously builds, raising the internal ambient temperature of the cooker well above boiling point, allowing food to steam, cook, and tenderize gradually without needing any external electrical or combustible fuel source.
👉 Read more:
What Is a Solar Cooker and How Does It Work
🔥 Types of Solar Cookers (Best for Beginners)
Choosing the right type is important for success.
1. Box Cookers (Best Choice)
- Easy to use
- Safe and stable
- Ideal for beginners
2. Panel Cookers
- Portable and lightweight
- Affordable
- Good for outdoor cooking
3. Parabolic Cookers
- Fast cooking
- Requires careful handling
- Better for advanced users
Understanding the Differences Between Solar Cooker Designs
When choosing your first solar cooker, understanding how heat is managed makes a major difference in your cooking style. Box cookers act like traditional thermal ovens. They feature an insulated box with a transparent glass or plastic lid and reflective flaps. Sunlight enters through the top, converts to thermal energy upon hitting the dark interior walls, and remains trapped inside. Because of this high thermal retention, box cookers maintain steady temperatures making them ideal for baking bread, simmering stews, and slow-cooking roasts without monitoring.
Panel cookers, on the other hand, prioritize simplicity and extreme portability. They use large, flat reflective panels that collapse for easy storage, directing rays onto a dark pot enclosed within a heat-resistant oven bag. While they don’t hold heat as long as insulated box cookers, they heat up rapidly on sunny days and are perfect for camping or quick meal prep.
Lastly, parabolic cookers use curved, dish-like mirrors to focus incoming sunlight onto a single, highly concentrated focal point. This creates intense surface heat allowing you to fry, boil water quickly, or sear food much like a gas stove burner. However, because the focal point is so intense, parabolic cookers require active supervision, frequent repositioning to track the sun, and protective eyewear during operation.
👉 Learn more:
Types of Solar Cookers Explained
👨🍳 How to Use a Solar Cooker (Step-by-Step)
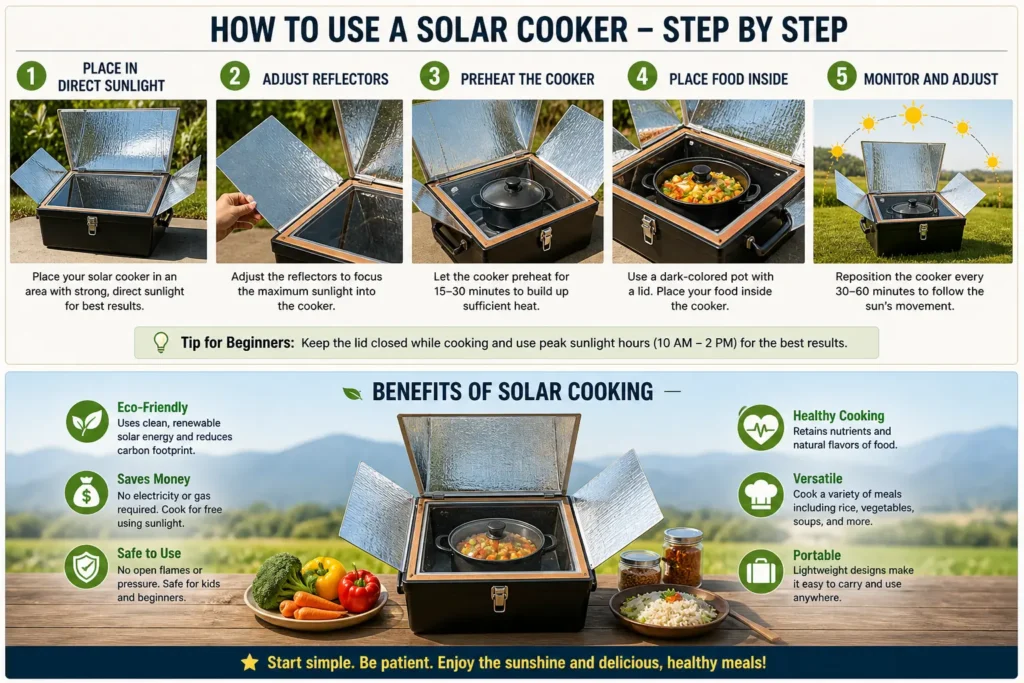
Follow these simple steps to start cooking with solar energy:
Step 1: Place Cooker in Direct Sunlight
Choose an open area with maximum sunlight exposure.
Step 2: Adjust Reflectors
Position reflective panels to focus sunlight into the cooker.
Step 3: Preheat the Cooker
Allow 15–30 minutes for heat to build up.
Step 4: Place Food Inside
Use a dark pot with a lid for best results.
Step 5: Monitor and Adjust
Reposition the cooker every 30–60 minutes to follow the sun.
🛒 Best Solar Cookers for Beginners (Recommended)
If you want a quick start, choosing a ready-made solar cooker is the easiest option.
👉 Check out beginner-friendly options here:
👉 View Best Box Solar Cookers on Amazon
💡 Tip: Choose a box cooker if you are just starting.
🧭 How to Choose the Right Solar Cooker
Consider these factors before buying:
- Daily cooking → Box cooker
- Camping use → Panel cooker
- Fast cooking → Parabolic cooker
Also consider:
- Size and capacity
- Portability
- Budget
- Ease of setup
👉 See full guide:
Best Solar Cookers for 2026
🍳 What Can You Cook in a Solar Cooker?
You can cook many types of food, including:
- Rice and grains
- Vegetables
- Meat and fish
- Soups and stews
- Bread and cakes
👉 Read more:
What Foods Can You Cook in a Solar Cooker
🌤️ Best Conditions for Solar Cooking
For best results, always cook during optimal sunlight conditions:
- Time: 10:00 AM – 2:00 PM
- Clear sky with minimal clouds
- Place cooker facing direct sunlight
- Avoid windy or shaded areas
👉 Strong sunlight = faster cooking and better results
🧪 Solar Cooker Cooking Time Guide
Here’s a quick estimate for beginners:
- Rice: 1–2 hours
- Vegetables: 1–2 hours
- Meat: 2–4 hours
- Eggs: 30–60 minutes
Cooking time depends on sunlight intensity and cooker type.
💡 Solar Cooking Tips for Beginners
- Place your cooker in direct sunlight
- Adjust direction every 1–2 hours
- Use black pots for better heat absorption
- Avoid opening the lid too often
- Start with simple meals
🌱 Why Use a Solar Cooker?
Solar cooking is growing in popularity because it:
- Saves money on fuel
- Reduces carbon footprint
- Is safe and easy to use
- Works great in sunny climates
It is a simple way to use Renewable energy in daily life.
☀️ Solar Cooking Safety & Quick Troubleshooting
While solar cooking is inherently safe because there are no open flames or electrical risks, keeping a few practical safety rules in mind ensures a smooth experience:
- Steam Hazards & Pot Handling: Dark cookware retains heat for hours. Always use heavy-duty oven mitts when removing lids or handling pots inside a solar cooker. Lids should always be tilted away from your face to prevent steam burns.
- Eye Protection: Reflective panels and parabolic reflectors direct bright, concentrated sunlight toward a central point. When setting up or adjusting parabolic cookers, wearing UV-blocking sunglasses is recommended to prevent eye strain.
- Food Safety & Temperature Standards: For safe food preparation, ensure your meal reaches an internal temperature of at least 150°F (65°C) to eliminate bacteria. If heavy cloud cover causes the cooker temperature to drop below 140°F (60°C) for extended periods while preparing meat, finish cooking on a conventional stovetop to guarantee food safety.
❓ FAQ
What is genuinely the best solar cooker for a total beginner?
Without a doubt, a box cooker. Think of it as the “slow cooker” of the solar world. Because it is fully insulated with a glass or plastic top, it holds heat beautifully and is incredibly forgiving. If a few clouds roll by, a box cooker won’t lose all its heat instantly. It’s safe, stable, and almost impossible to burn your food in.
Is solar cooking complicated or high-maintenance?
Not at all. In fact, it requires much less active attention than traditional stovetop cooking because food rarely burns or sticks to the pot. The only “maintenance” involved is occasionally turning the cooker every hour or two to track the sun, but even if you leave a box cooker unattended for three hours, you’ll still come back to a hot, fully cooked meal.
How long does a solar cooker actually take compared to a kitchen stove?
As a general rule of thumb, expect solar cooking to take about twice as long as a conventional oven or stovetop. On a bright, clear day:
Eggs and grains (like rice): 1 to 2 hours.
Vegetables and soups: 1 to 3 hours.
Meats (chicken, beef stews): 2 to 4 hours.
Tip: Treat it like a crockpot. Start your meal ahead of time, let the sun do the heavy lifting, and it will be perfectly tender right at lunchtime.
Can I cook perfect rice in a solar cooker without it getting mushy?
Yes! Rice is actually one of the absolute best meals to start with because it thrives on the gentle, steady heat. Because the moisture is entirely trapped inside the dark, lidded pot, the rice grains steam evenly. Use your standard water-to-rice ratio, put it in a dark pot inside your cooker, and you’ll get incredibly fluffy results every single time.
What happens if a cloud blocks the sun? Does the cooking process stop?
If a cloud passes by for 10 or 15 minutes, a well-insulated box cooker will hold its temperature just fine. However, if it’s a heavily overcast day, the cooking process will slow down significantly. Solar cookers rely on direct UV rays, not just ambient air temperature. A good rule of thumb: if you can see a distinct shadow on the ground, you have enough sunlight to cook!
Can I use a solar cooker to fry or sear food?
Generally, no. Most beginner-friendly cookers (box and panel types) excel at baking, boiling, steaming, and slow-cooking. They don’t reach the intense, concentrated surface heat required to deep-fry or sear a steak. If frying is an absolute must for you, you would need to look into a high-powered parabolic cooker, which acts like a solar magnifying glass—though those require much more careful handling and frequent adjustments.
Final Thoughts: Give It a Chance!
If you’re on the fence, I highly encourage you to just take the plunge and try it out. There is something deeply satisfying about letting the sun do all the hard work while you go about your day. Plus, solar-cooked food retains so much moisture and flavor because it cooks so evenly. Grab a basic cooker, pick a sunny Saturday, and cook your first solar meal—you’ll be amazed at what a little sunshine can do!