
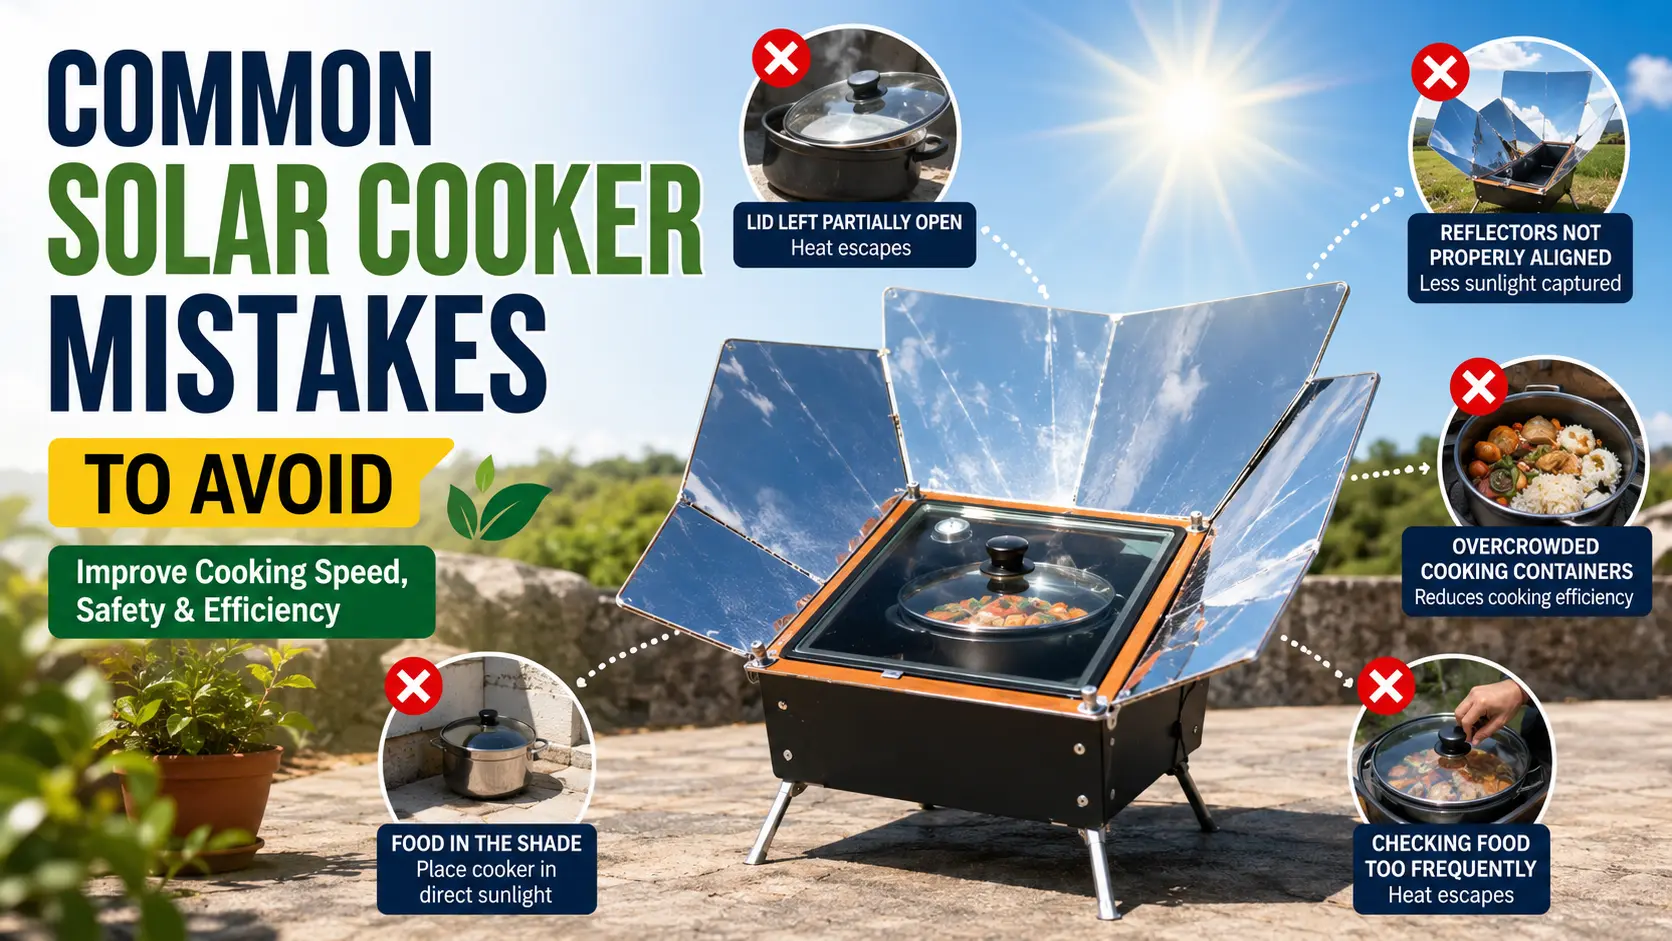
Learning how to avoid common solar cooker mistakes is the fastest way to turn an unpredictable outdoor setup into a smooth, reliable cooking routine. Solar cooking is remarkably simple in theory, but minor setup errors—like poor sun tracking, using the wrong cookware, or unexpected wind exposure—can quickly stall heat accumulation and leave your meal undercooked.
Understanding common solar cooker mistakes helps you cook more efficiently and safely.
Table of Contents
My Own “Learning Curve”
When I first started experimenting with solar cooking, I’ll be the first to admit I made almost every mistake on this list. I remember one afternoon in Sri Damansara where I spent three hours trying to cook a simple stew, only to realize I hadn’t accounted for the shadow of a nearby tree that slowly crept over my reflectors. I thought the cooker was broken! It turns out, the equipment was fine—my setup just needed a little more attention. Solar cooking is a skill, and like any skill, your first few tries are really just part of the adventure.
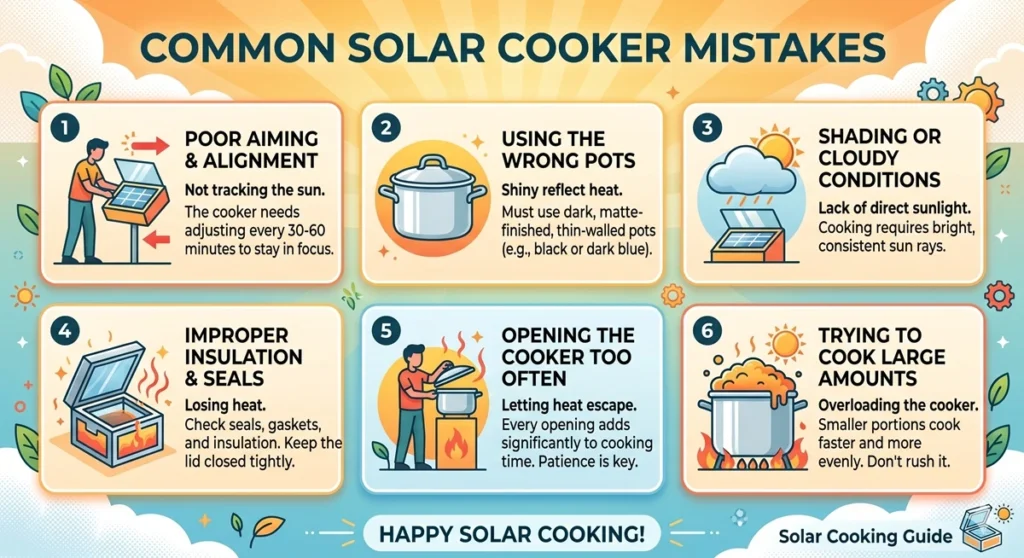
Common Solar Cooker Mistakes
1. Not Positioning the Cooker Directly Toward the Sun
Solar cookers must face direct sunlight to work effectively.
A slight misalignment can significantly reduce internal temperature. Even a small shadow inside the cooking chamber lowers efficiency.
✔ Always adjust the cooker every 30–60 minutes.
✔ Check that no shadows fall across reflective panels.
✔ Align during peak sunlight hours (10:30 AM–2:30 PM).
Proper alignment directly affects the temperature your cooker can reach.
2. Cooking Too Early or Too Late in the Day
Many beginners try solar cooking early morning or late afternoon. Sunlight intensity during these times is weaker.
Solar cookers perform best when:
- The sun is high in the sky
- The weather is clear
- There is minimal cloud cover
If cooking outside peak hours, expect longer cooking times.
For estimated durations, read How Long Does a Solar Cooker Take to Cook Food.
3. Using the Wrong Cookware
Reflective or light-colored pots reduce heat absorption.
For better results:
✔ Use dark-colored cookware
✔ Use thin metal or black enamel pots
✔ Always use tight-fitting lids
Proper cookware can increase efficiency noticeably.
4. Opening the Cooker Too Frequently
Every time you lift the lid:
- Heat escapes
- Internal temperature drops
- Cooking time increases
Solar cooking works like a slow cooker — allow heat to build steadily.
Avoid checking food repeatedly unless necessary.
The “Peeking” Trap
This was my biggest hurdle: I’m naturally curious, and I kept wanting to open the lid to see if the water was bubbling yet. In the world of solar cooking, “if you’re lookin’, you ain’t cookin’.” Every time I lifted that lid to check, I was basically resetting my progress by ten minutes. Once I learned to trust the physics and just leave it alone, my success rate skyrocketed. Now, I use that “waiting time” to get other things done around the house, knowing the sun is doing its job perfectly without my help.
Why You Should Avoid Opening the Solar Cooker
It is natural to want to open the solar cooker lid to check whether your food is ready. With a normal gas or electric stove, opening the lid for a few seconds usually does not make much difference. But with a solar cooker, it can have a much bigger effect.
A solar cooker depends on trapping and building up heat inside the cooking chamber. When you open the lid or glass cover, the hot air inside escapes quickly and is replaced by cooler outside air. Some of the heat that has built up inside is lost in just a few seconds.
The cooker then needs time to build that heat back up using sunlight. If the weather is cloudy, windy, or the sunlight is weak, this can take even longer. A significant drop in temperature can easily add 15 to 25 minutes to the cooking time.
That is why it is better to keep the cooker closed as much as possible. Instead of opening the lid to check the food, use a clear viewing window or an external thermometer if your cooker has one.
In solar cooking, keeping the heat inside is just as important as collecting more sunlight.
5. Trying to Cook Too Much Food at Once
Overloading the cooking chamber slows down heating.
Large quantities:
- Take longer to heat
- Block sunlight circulation
- Reduce efficiency
Beginners should start with:
- Small portions
- Thin food cuts
- Simple recipes
6. Expecting Instant Results
Solar cooking is different from gas or electric cooking.
Many beginners expect:
- Fast heating
- Immediate sizzling
- Quick boiling
Solar cooking is gradual. It requires patience.
Box solar cookers typically operate between 120–160°C under strong sunlight. That is sufficient for safe cooking but slower than conventional methods.
If you want to understand temperature limits, see What Temperature Can a Solar Cooker Reach.
7. Ignoring Wind Conditions
Wind can:
- Cool the cooker
- Shift reflector alignment
- Reduce overall temperature
Place your cooker in:
- A stable location
- A sheltered area
- A flat surface
Wind protection significantly improves performance.
8. Cooking Frozen Meat Without Thawing
Frozen food takes much longer to reach safe internal temperature.
Always:
✔ Thaw meat completely
✔ Cut into smaller pieces
✔ Use a thermometer when possible
Handling meat requires a bit more precision. If you’re feeling unsure about the safety side of things, I’ve put together a Step-by-Step Safety Guide that covers exactly how to handle hot pots and maintain hygiene while cooking outdoors.”
Solar cookers can cook meat safely when used properly. Learn more in Can You Cook Meat in a Solar Cooker.
9. Not Cleaning Reflective Surfaces
Dust and dirt reduce reflective efficiency.
To maintain performance:
- Wipe reflectors gently
- Avoid scratches
- Store indoors when not in use
Clean surfaces concentrate sunlight more effectively.
10. Choosing the Wrong Type of Solar Cooker
Different solar cookers have different performance levels.
- Box cookers: best for beginners
- Panel cookers: budget-friendly but slower
- Parabolic cookers: higher temperatures but require supervision
Understanding these differences helps avoid frustration. Read Types of Solar Cookers Explained for more details.
If you’re new, check out our guide on how solar cookers work.
📋 Pre-Flight Checklist: Setting Up Your Solar Cooker
Before placing your food pot inside the chamber, run through this simple setup checklist to eliminate performance errors:
- Check for Micro-Shadows: Stand behind your cooker and look inside the chamber. Ensure no shadows from tree branches, porch overhangs, or nearby fence posts cut across the reflective panels or the floor.
- Feel the Base Seal: Inspect the rubber gaskets or cloth insulation seals around your lid. Tape over accidental air gaps to stop hot air from leaking out.
- Verify the Pot Surface: Ensure your cooking pot is matte black or dark enamel. If the pot has become dusty or scratched, wipe it clean so sunlight converts efficiently into surface heat.
- Set a Tracking Timer: Set a timer on your phone for every 45 minutes as a friendly reminder to adjust your cooker’s angle toward the sun.
Final Thoughts
Most solar cooking problems come from setup mistakes rather than equipment failure.
By avoiding these common solar cooker mistakes:
- You improve cooking efficiency
- You reduce cooking time
- You ensure food safety
- You get more consistent results
Solar cooking works extremely well when used correctly. Patience, proper alignment, and correct cookware make a significant difference.
👉 Looking for the best solar cooker? Check our top recommendations here.
Frequently Asked Questions (FAQ)
1. Why is my solar cooker not heating properly?
Your solar cooker may not be facing direct sunlight, or the reflectors may not be positioned correctly. Other causes include cloudy weather, poor insulation, or using the wrong type of cookware.
2. What is the best time to use a solar cooker?
The best time to use a solar cooker is between 10 AM and 2 PM when sunlight is strongest. Cooking outside these hours may result in slower or uneven cooking.
3. What type of cookware works best in a solar cooker?
Dark-colored, thin metal pots with lids work best because they absorb heat efficiently. Avoid shiny or reflective cookware as it reflects sunlight away.
4. Can I use a solar cooker on a cloudy day?
Solar cookers work best in direct sunlight. On cloudy days, performance will decrease significantly, and cooking may take much longer or not work at all.
5. Do I need to preheat a solar cooker?
Yes, preheating your solar cooker for 15–30 minutes can improve cooking performance and reduce overall cooking time.
“I usually set my cooker out while I’m still chopping the vegetables; by the time I’m ready to put the pot in, the chamber is already nice and toasty.”
6. How can I make my solar cooker more efficient?
You can improve efficiency by adjusting the cooker to follow the sun, sealing heat properly, using reflectors, and minimizing how often you open the lid.
7. What are the most common solar cooker mistakes?
The most common solar cooker mistakes include poor positioning, using incorrect cookware, opening the cooker too often, and cooking at the wrong time of day.
New to solar cooking?
We’ve compiled answers to the 50 questions people ask most often. Visit our Solar Cooker FAQ and become a more confident solar cook.